Your First City
Let's build your first WhookTown city! In this tutorial, you'll create a simple layout with a few buildings, then launch the 3D scene to see it come alive.
Step 1: Access the Map Builder
From the dashboard, click Map Builder in the Quick Actions section, or use the sidebar navigation.
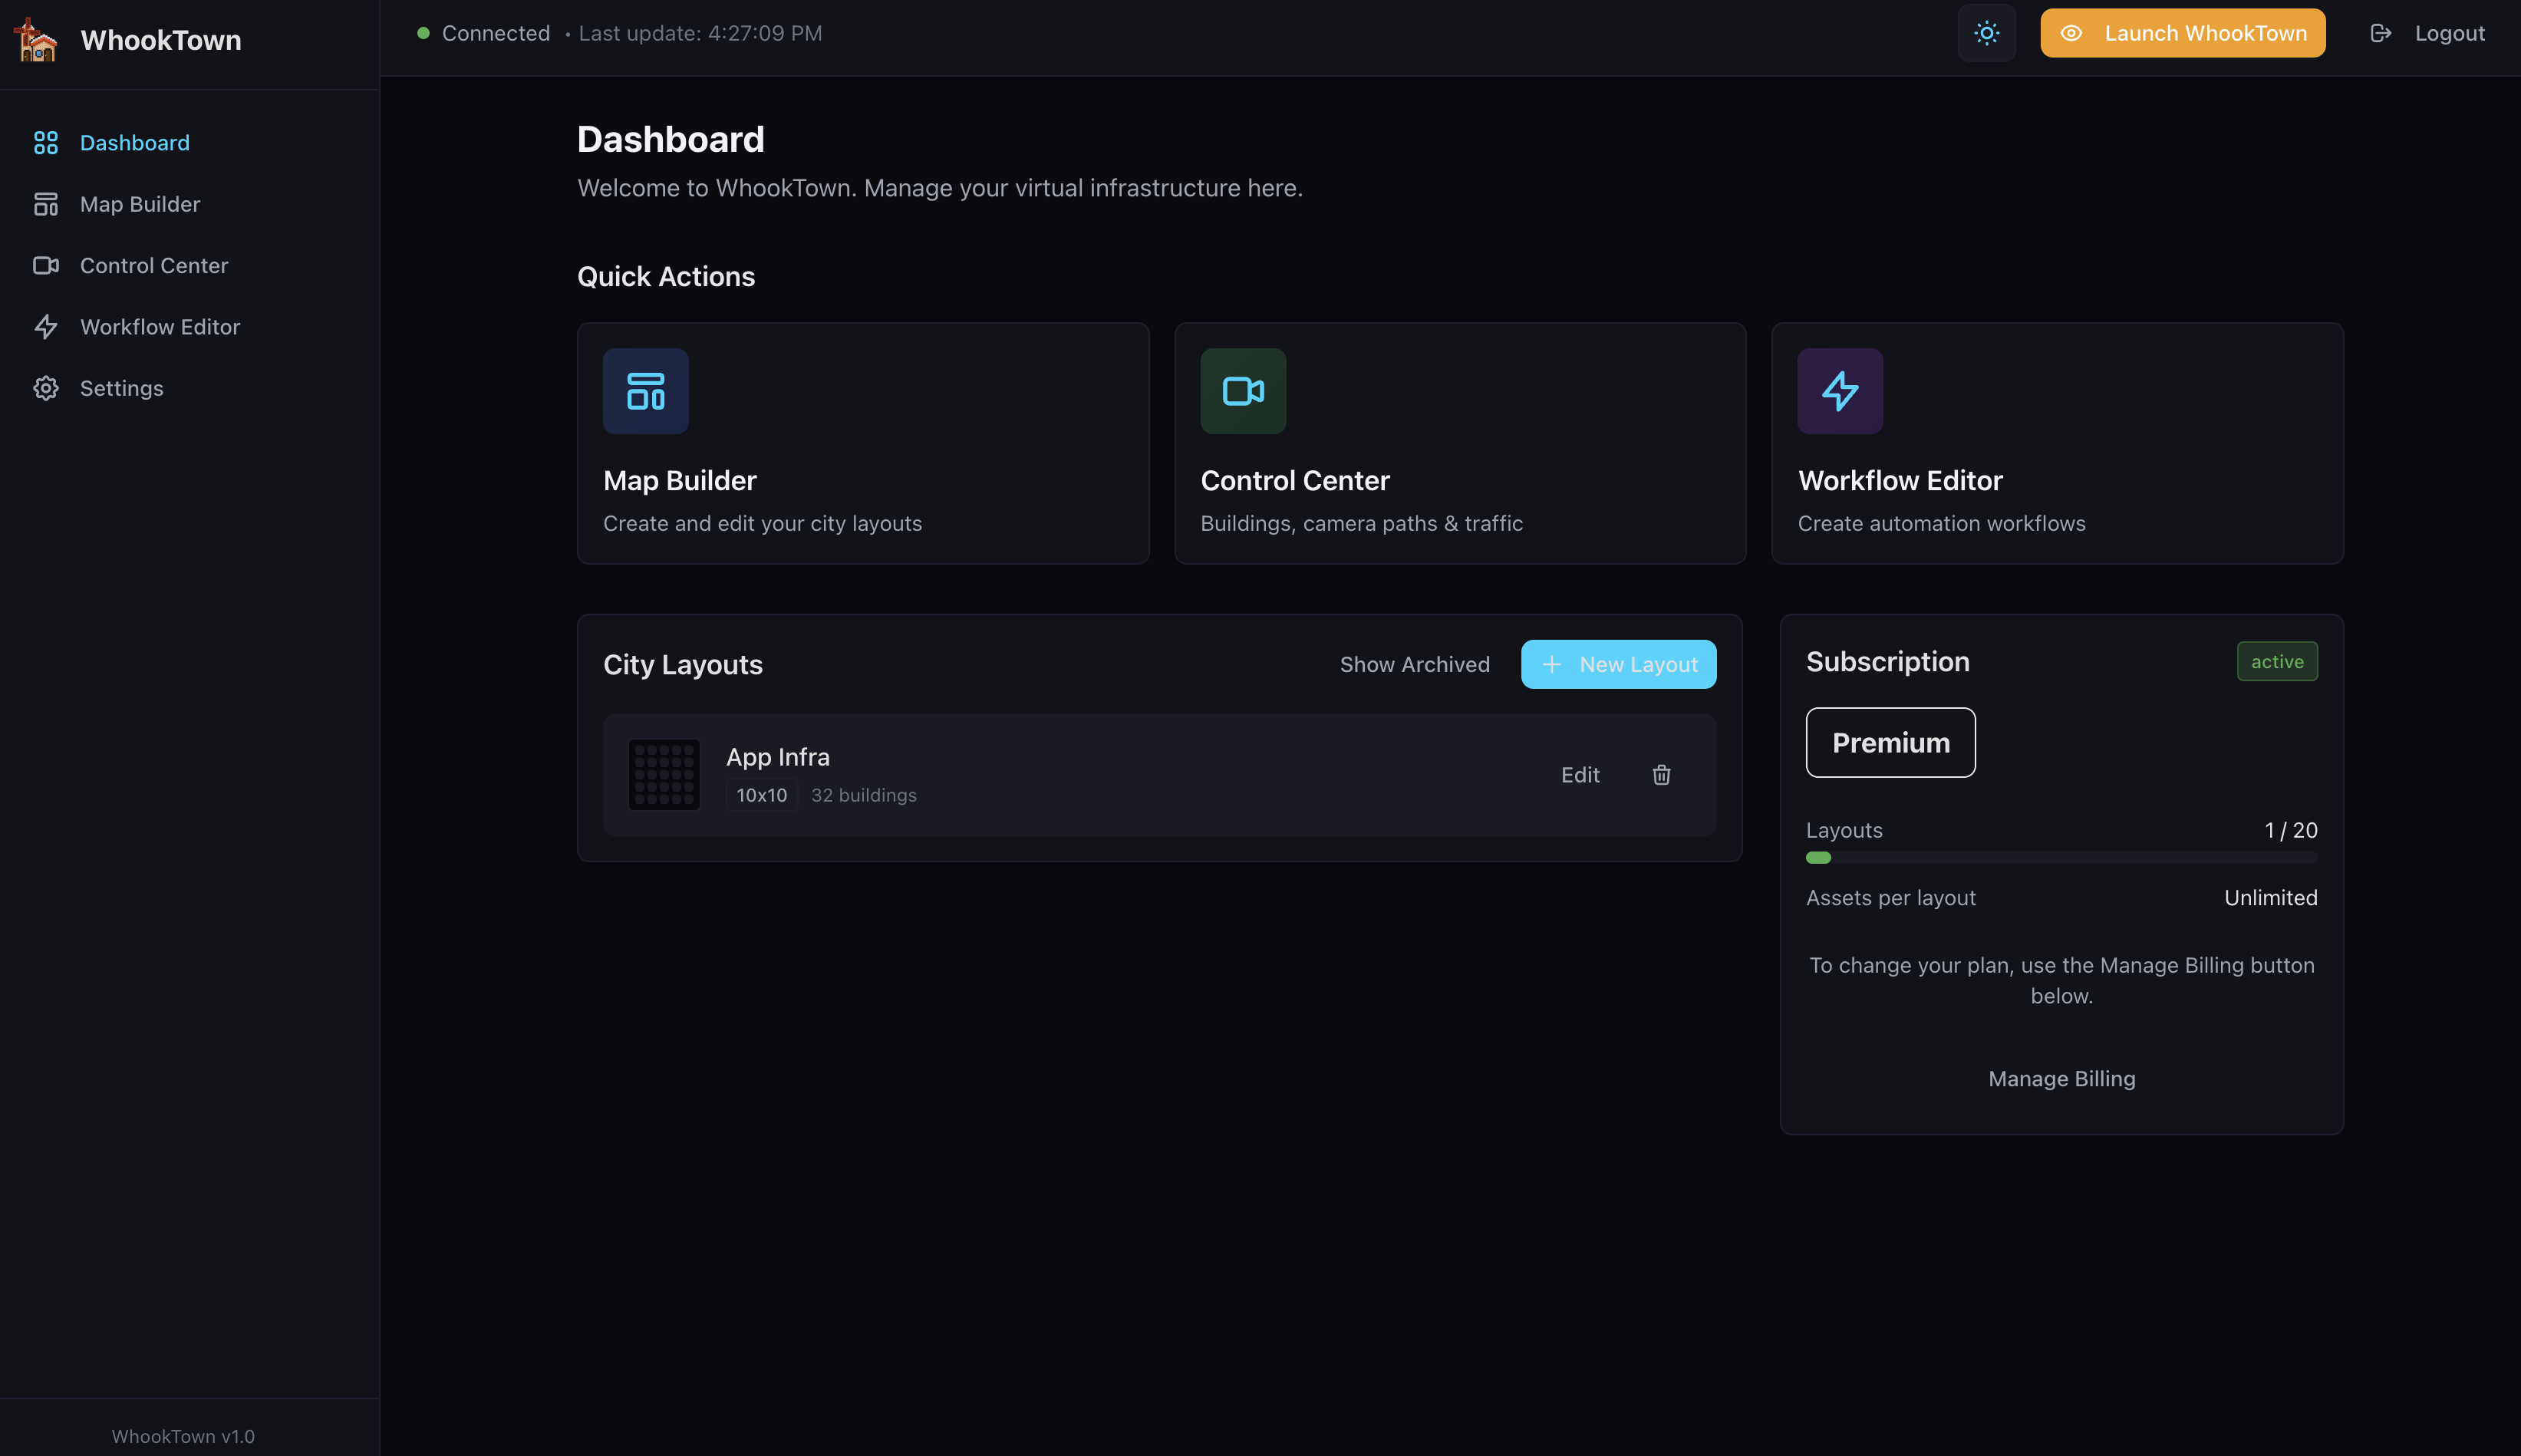
Step 2: Name Your City
In the Map Builder, enter a name for your city in the City Name field. For example: "My Infrastructure".
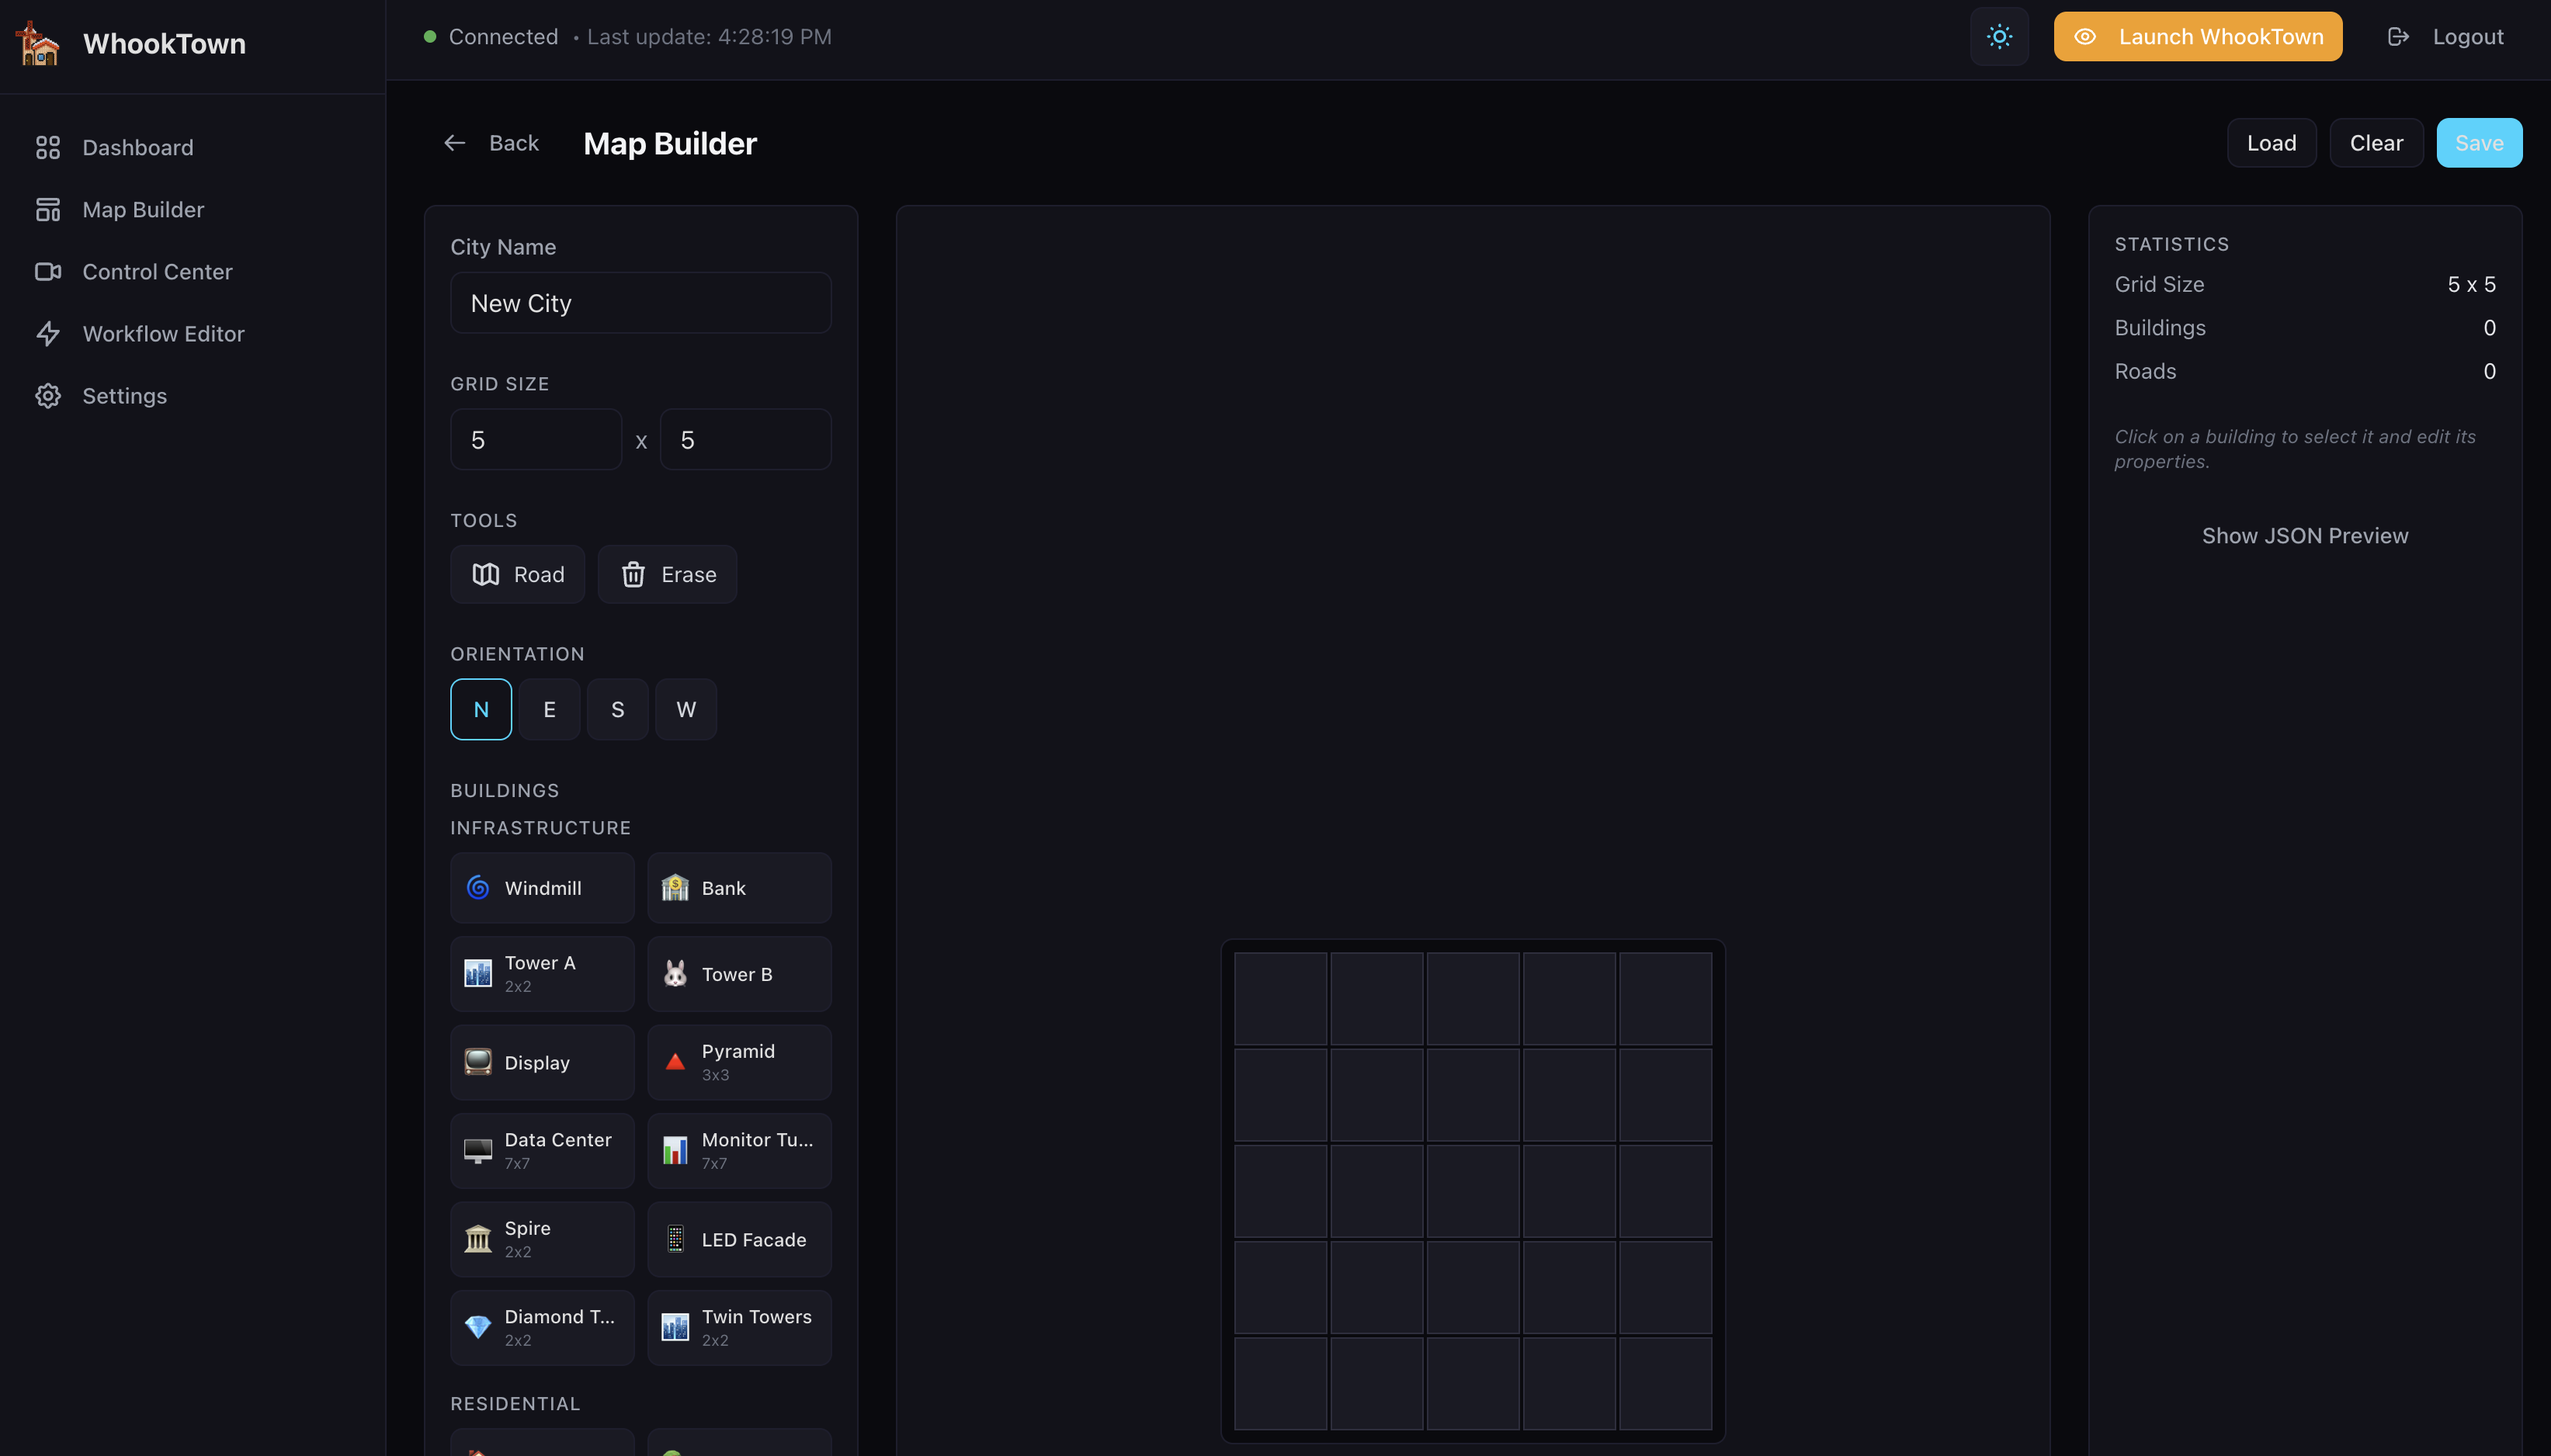
Step 3: Set Grid Size
Adjust the grid dimensions using the Grid Size controls:
- Width: 5-20 cells
- Height: 5-20 cells
For your first city, try a 5x5 or 6x6 grid.
Step 4: Add Roads
- Select the Road tool from the Tools section
- Click on grid cells to draw roads
- Roads connect buildings visually and enable traffic flow
Road patterns
Try creating a simple cross pattern (+) or a loop for traffic to flow through.
Step 5: Place Buildings
- Browse the Building Palette on the left
- Buildings are organized by category:
- Infrastructure: Windmill, Data Center, Tower, Pyramid, etc.
- Residential: House A, B, C (different skyscraper styles)
- Farm: Agricultural buildings and fields
- Click a building type to select it
- Set the Orientation (N/E/S/W) for the building's facing direction
- Click on a grid cell to place the building
Suggested First Buildings
| Building | Represents | Size |
|---|---|---|
| Windmill | Application server | 1x1 |
| Data Center | Database cluster | 3x3 |
| Tower A | API gateway | 1x1 |
| House B | Microservice | 2x2 |
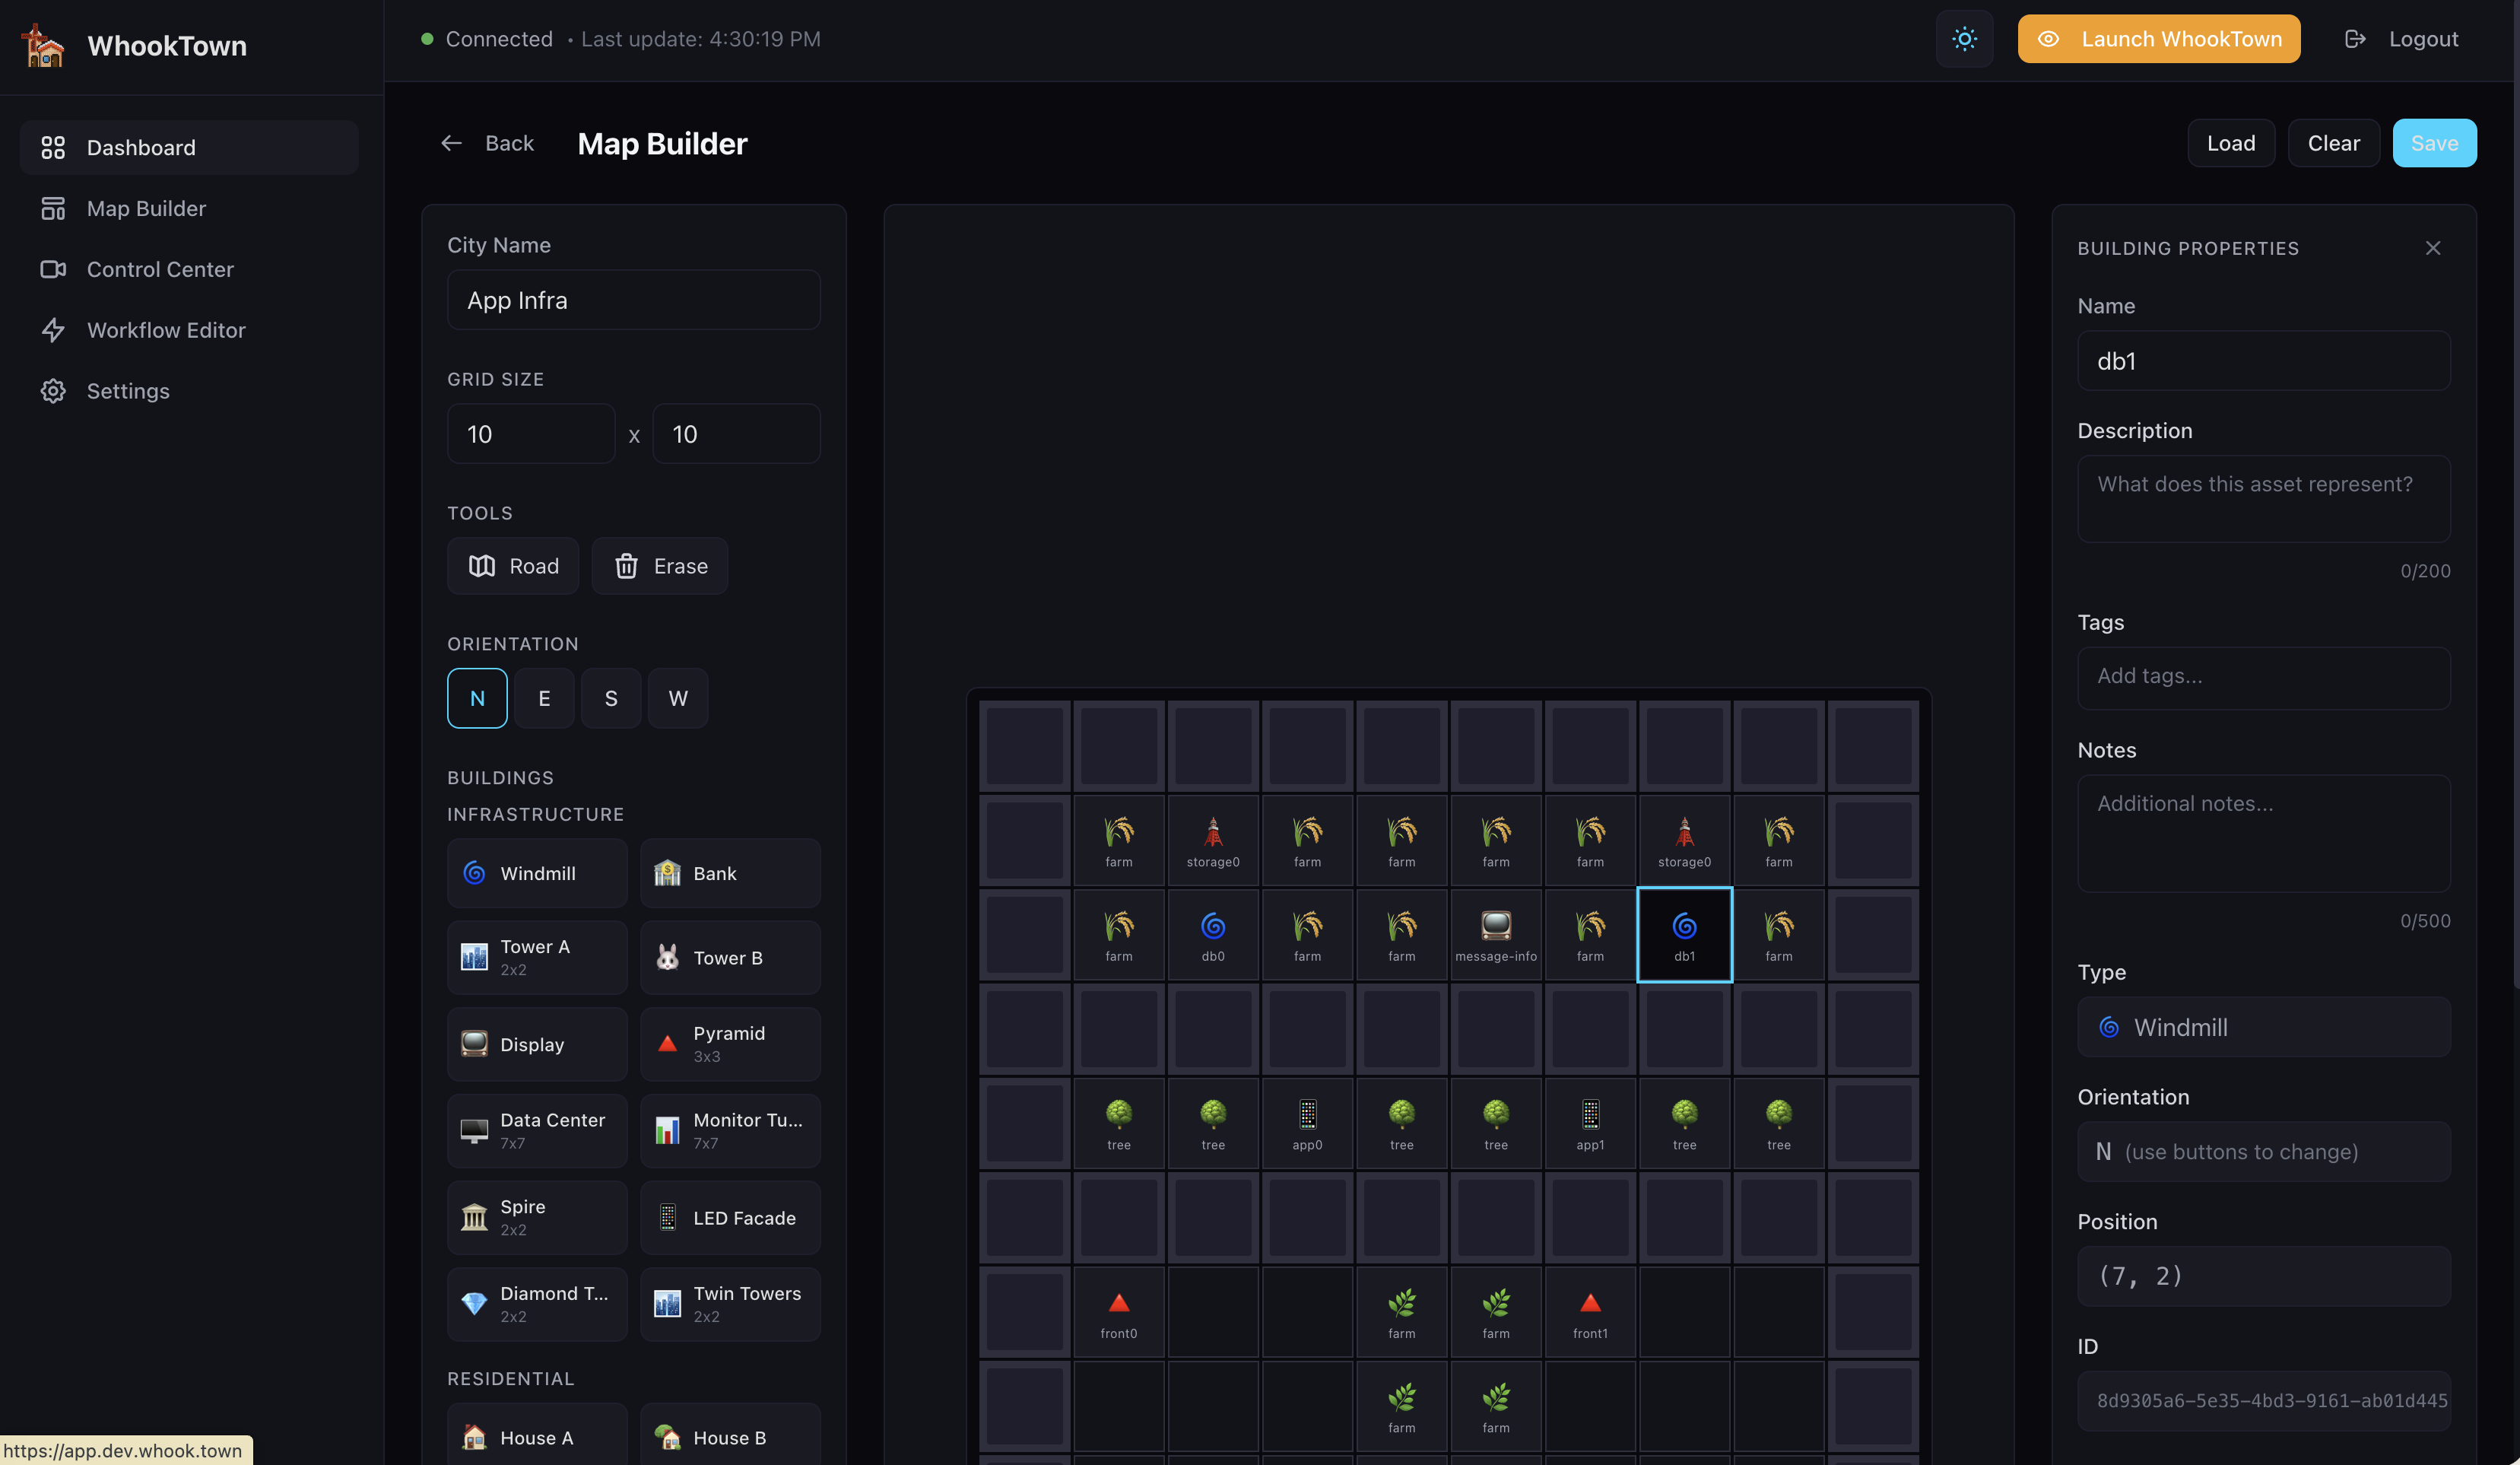
Step 6: Configure Building Properties
- Click on a placed building to select it
- In the right panel, configure:
- Name: A descriptive name (e.g., "Production API")
- Description: What this building represents
- Tags: Keywords for filtering (e.g., "production", "api")
- Notes: Additional information
Step 7: Save Your Layout
Click the Save button in the top-right corner. Your layout is now saved and ready to use.
Step 8: Launch the 3D Scene
- Return to the Dashboard
- Click the Launch WhookTown button in the header
- A new tab opens with the 3D scene at scene.whook.town
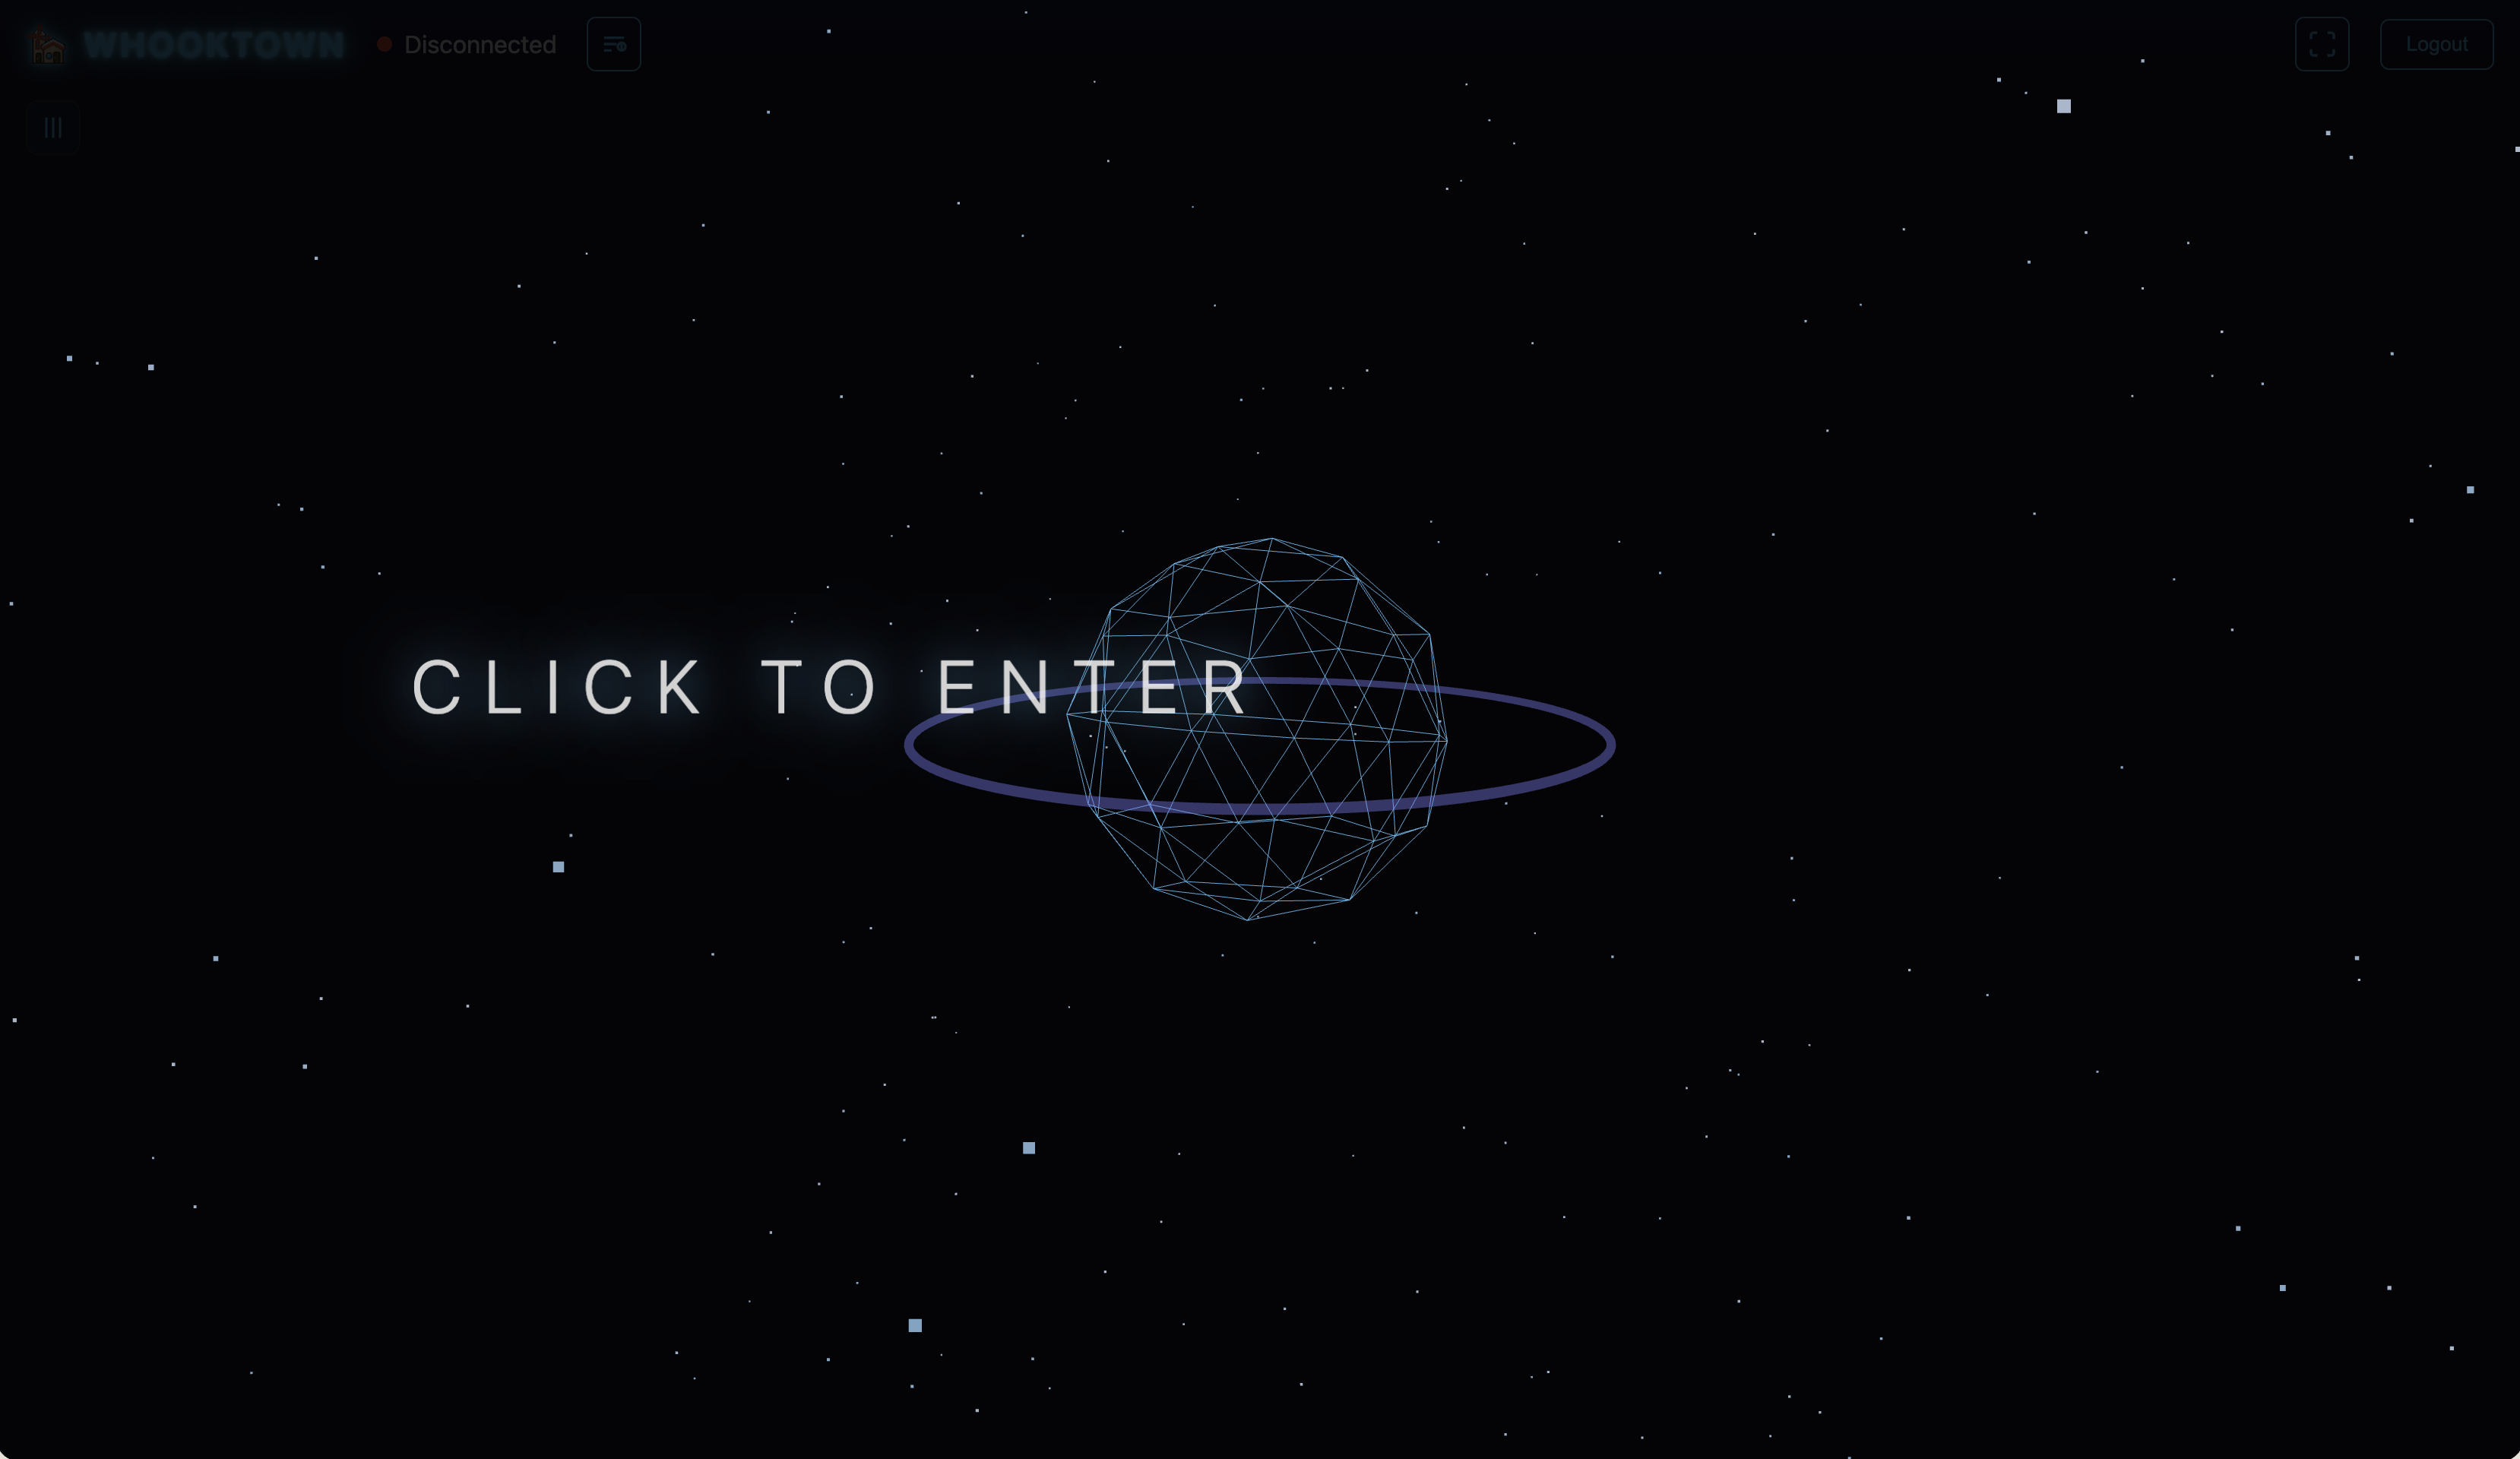
- Click anywhere on the "Click to Enter" screen to start
- Your city appears in 3D!
Step 9: Explore Your City
Use these controls to navigate:
| Control | Action |
|---|---|
| Left-click + drag | Rotate view |
| Right-click + drag | Pan view |
| Mouse wheel | Zoom in/out |
| Click a building | Show details |
What's Next?
Now that you have a basic city, you can:
Control Buildings in Real-Time
Go to Control Center > Buildings to:
- Change building status (Online/Warning/Critical/Offline)
- Adjust activity levels (Slow/Normal/Fast)
- Show/hide building labels
Add Traffic
In Control Center > Traffic:
- Enable traffic to see Tron-style vehicles on your roads
- Adjust density and speed
Create Camera Paths
In Control Center > Camera Path:
- Define automated flyover paths through your city
- Create cinematic sequences for presentations
Send Sensor Data
Integrate your monitoring tools to update buildings automatically:
# Using the CLI
wt sensor send --id <building-id> --status online --activity fast

# Using the API
curl -X POST https://sensor.whook.town/sensors \
  -H "Authorization: Bearer <your-token>" \
  -H "Content-Type: application/json" \
  -d '{"id": "<building-id>", "status": "online", "activity": "normal"}'
Create Workflows
Use the Workflow Editor to automatically update building states based on conditions:
- If Database is offline → Set API to critical
- If all services online → Set Status Dashboard to online
Congratulations! You've created your first WhookTown city. Explore the Web App Guide to learn about all the features.